
How to Make a Quiz
Online quizzes are an essential tool for engaging audiences and capturing leads for your business. With our drag-and-drop quiz creator and automated scoring, you’ll be able to make anything from personality quizzes to student exams and risk assessment tests effortlessly.
Steps to Making a Quiz
Section titled “Steps to Making a Quiz”Below you’ll find the necessary steps to how to make a quiz:
1. Make a Quiz
Section titled “1. Make a Quiz”You will be able to make a quiz from the Home dashboard, once you’ve logged in.
-
Go to Home and click the ‘New form’ button
-
Choose ‘Start from scratch’ (or describe it for AI to draft, or upload a document to convert)
-
On the ‘Set up your form’ screen, select Quiz as the Form type, name your quiz, and pick how many questions to show per page
-
Click ‘Create form’
From here you’ll be directed to the quiz builder, where you can add questions, customize settings, and tailor your quiz design.
2. Adding Questions
Section titled “2. Adding Questions”Once you’ve created your quiz, you’ll need to start adding questions.
- Open the Questions tab in the sidebar
- Click the ‘+ Question’ button
- Select a question type (types that can contribute to a quiz score are highlighted when the ‘Quiz score’ filter is on)
- Write answer choices
- Apply Question Points
Question Types (Quizzes)
Section titled “Question Types (Quizzes)”You have access to a range of multiple-choice and open-ended questions. Of these, Multi-Choice (Single Select), Multi-Choice (Multi Select), Binary Yes/No and Drop Down List are flagged as usable for quiz scoring — see How to Apply Points to Questions for how scoring actually works on each.
- Multi-Choice (Single Select)
- Multi-Choice (Multi Select)
- Drop Down List
- Comment/ Essay Box
- Text Box (Single)
- Text Boxes (Multiple)
- Picture Choice Question (Single)
- Picture Choice Question (Multiple)
- Contact Details
- Presentational Items
Contact Details
Section titled “Contact Details”You’ll have access to a set of fields with custom settings to collect respondent information. Such as:
- Website
- Phone Number (Validation)
- Address Lookup (using Zipcode or Postcode - US/ UK only)
- Contact Form (Name, Email, Address)
Content and Media
Section titled “Content and Media”Add content other than questions into your survey to provide additional information for respondents.
- Headings
- Text
- Images
- Videos (linked from YouTube or Vimeo)
3. Add Pages
Section titled “3. Add Pages”If your quiz is becoming too long to fit on a single page, you can insert additional pages to break up your project.
This will not only make it easier for you to visualize and edit your project, but also give respondents a sense of progress and achievement in completing your quiz.
Create a new page:
Section titled “Create a new page:”- Open the Questions tab in the left sidebar
- Click the + Page button (beneath your questions, or beneath ‘Exit pages’ for an exit page)
- Click ‘Question Page’ or ‘Exit Page’
Question Pages: Where all your questions and form elements are placed.
Exit Pages: These are the final pages respondents will see before they leave your project. New quizzes come with a “Marking” exit page already set up (Exit page type: ‘Score/Marking page’) so respondents see their score — see Show or Hide Quiz Scores. You can also add further exit pages to thank participants or redirect them elsewhere on completion.
4. Customizing the Quiz Design
Section titled “4. Customizing the Quiz Design”Before you send your quiz, you may want to customize its visual design. Open the Theme tab in the builder sidebar — it also has the ‘questions per page’ option (One/Many) alongside a selection of Themes you can pick and edit to suit your design or branding.
Theme Colors
Section titled “Theme Colors”Each theme has swatches to change the colors for text, background and highlights, plus a font swatch and a ‘Background Image’ option.
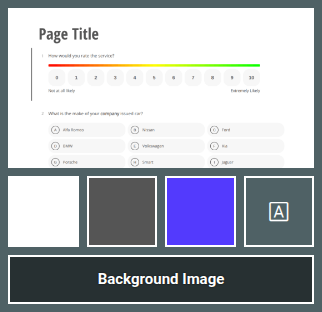
Choose from a set list of fonts for your quiz by selecting the font (‘A’) swatch, which opens the font picker.
Add a Logo
Section titled “Add a Logo”You can also add a logo to your quiz — hover over the page title to reveal ‘Add logo’ and ‘Add subheading’ buttons, plus a title-size slider.
5. Preview & Test
Section titled “5. Preview & Test”You will also want to preview your project before it’s launched. This feature formats your quiz as a respondent would see it; allowing you to check the structure, functionality, and spelling/ grammar. Click the eye/‘Preview’ icon next to Publish to choose Preview, Slideout, Phone or Tablet view.
6. Sharing your Quiz
Section titled “6. Sharing your Quiz”Click the Send tab at the top of the builder to see all distribution methods for your quiz:
- Get a link (URL) to your Quiz
- Share (quick share to email/Facebook/X/LinkedIn/Pinterest/WhatsApp/Reddit)
- QR Code
- Pop-ups and slideouts (buttons for your website)
- Embed your Project on your website (inline or drop-in code)
- Email invitations (using your contacts)
- Webhooks
- JavaScript API
More Guides and Tips
Section titled “More Guides and Tips”Below you’ll find a list of other useful articles concerning the project building process: