
Create or update a Salesforce lead
The Create a lead step can use Salesforce or monday. This article describes the Salesforce lead step, which looks for an existing lead and updates it or creates a new one.
How do I create a Salesforce lead from a response?
Section titled “How do I create a Salesforce lead from a response?”- Open the form’s Actions tab and create an Action with Completed response as its starter.
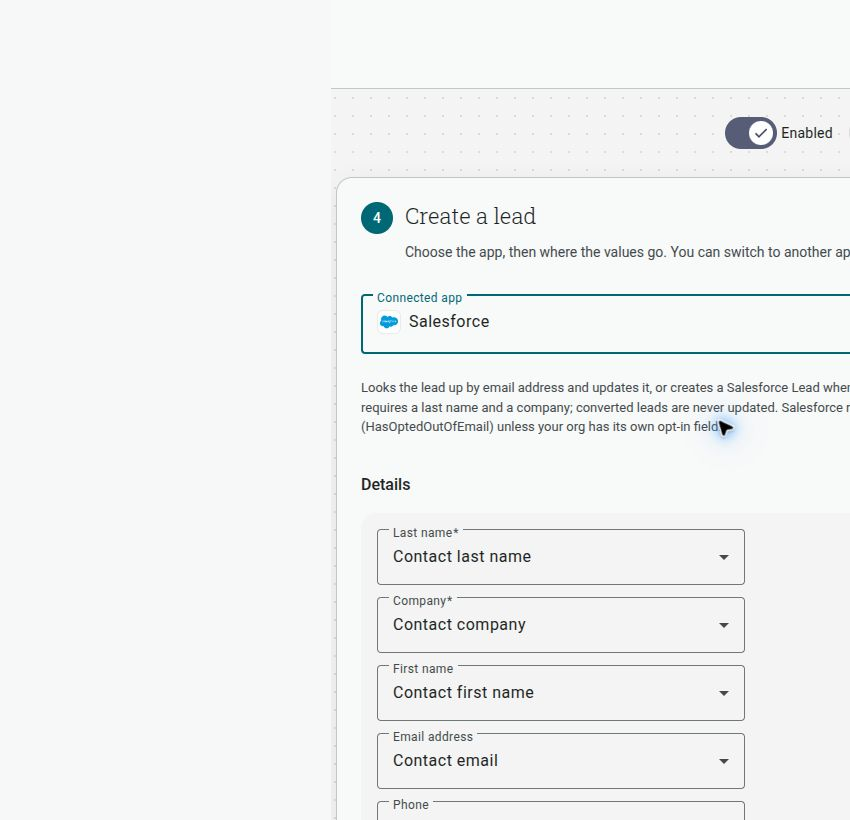
- Click Add step and choose Create a lead.
- Select Salesforce as the connected app.
- Map the required Last name and Company fields, then map any available first name, email address, phone and description values.
- Use More fields for additional Salesforce fields offered by the connection.
- Save the Action, review the destination, and enable it only when the lead mapping is ready.
How does Salesforce decide whether to update or create a lead?
Section titled “How does Salesforce decide whether to update or create a lead?”The step looks the lead up by email address and updates it, or creates a Salesforce Lead when no matching lead is found. A Salesforce lead requires a last name and a company. Converted leads are not updated.
The step’s current guidance also says that a lead can be created when there is no email address; without an email address there is no email match to use for an update.
What fields can I map?
Section titled “What fields can I map?”The standard fields shown by the current Salesforce step are:
- Last name — required
- Company — required
- First name
- Email address
- Phone
- Description
Custom fields are listed first under More fields. Fields that require another record’s ID are not offered by the picker.
How is email consent represented?
Section titled “How is email consent represented?”The Salesforce step records email marketing consent as Email Opt Out
(HasOptedOutOfEmail) unless the Salesforce organisation has its own opt-in field. Make sure the
form wording and your Salesforce consent process agree before sending data.