
Create a task, ticket or note
Use Create a task, Create a ticket or Create a note when an Action should create work in another app. Connect the app first, then choose the destination and map the form, contact or ticket values into the fields offered by that app.
How do I create an Asana task?
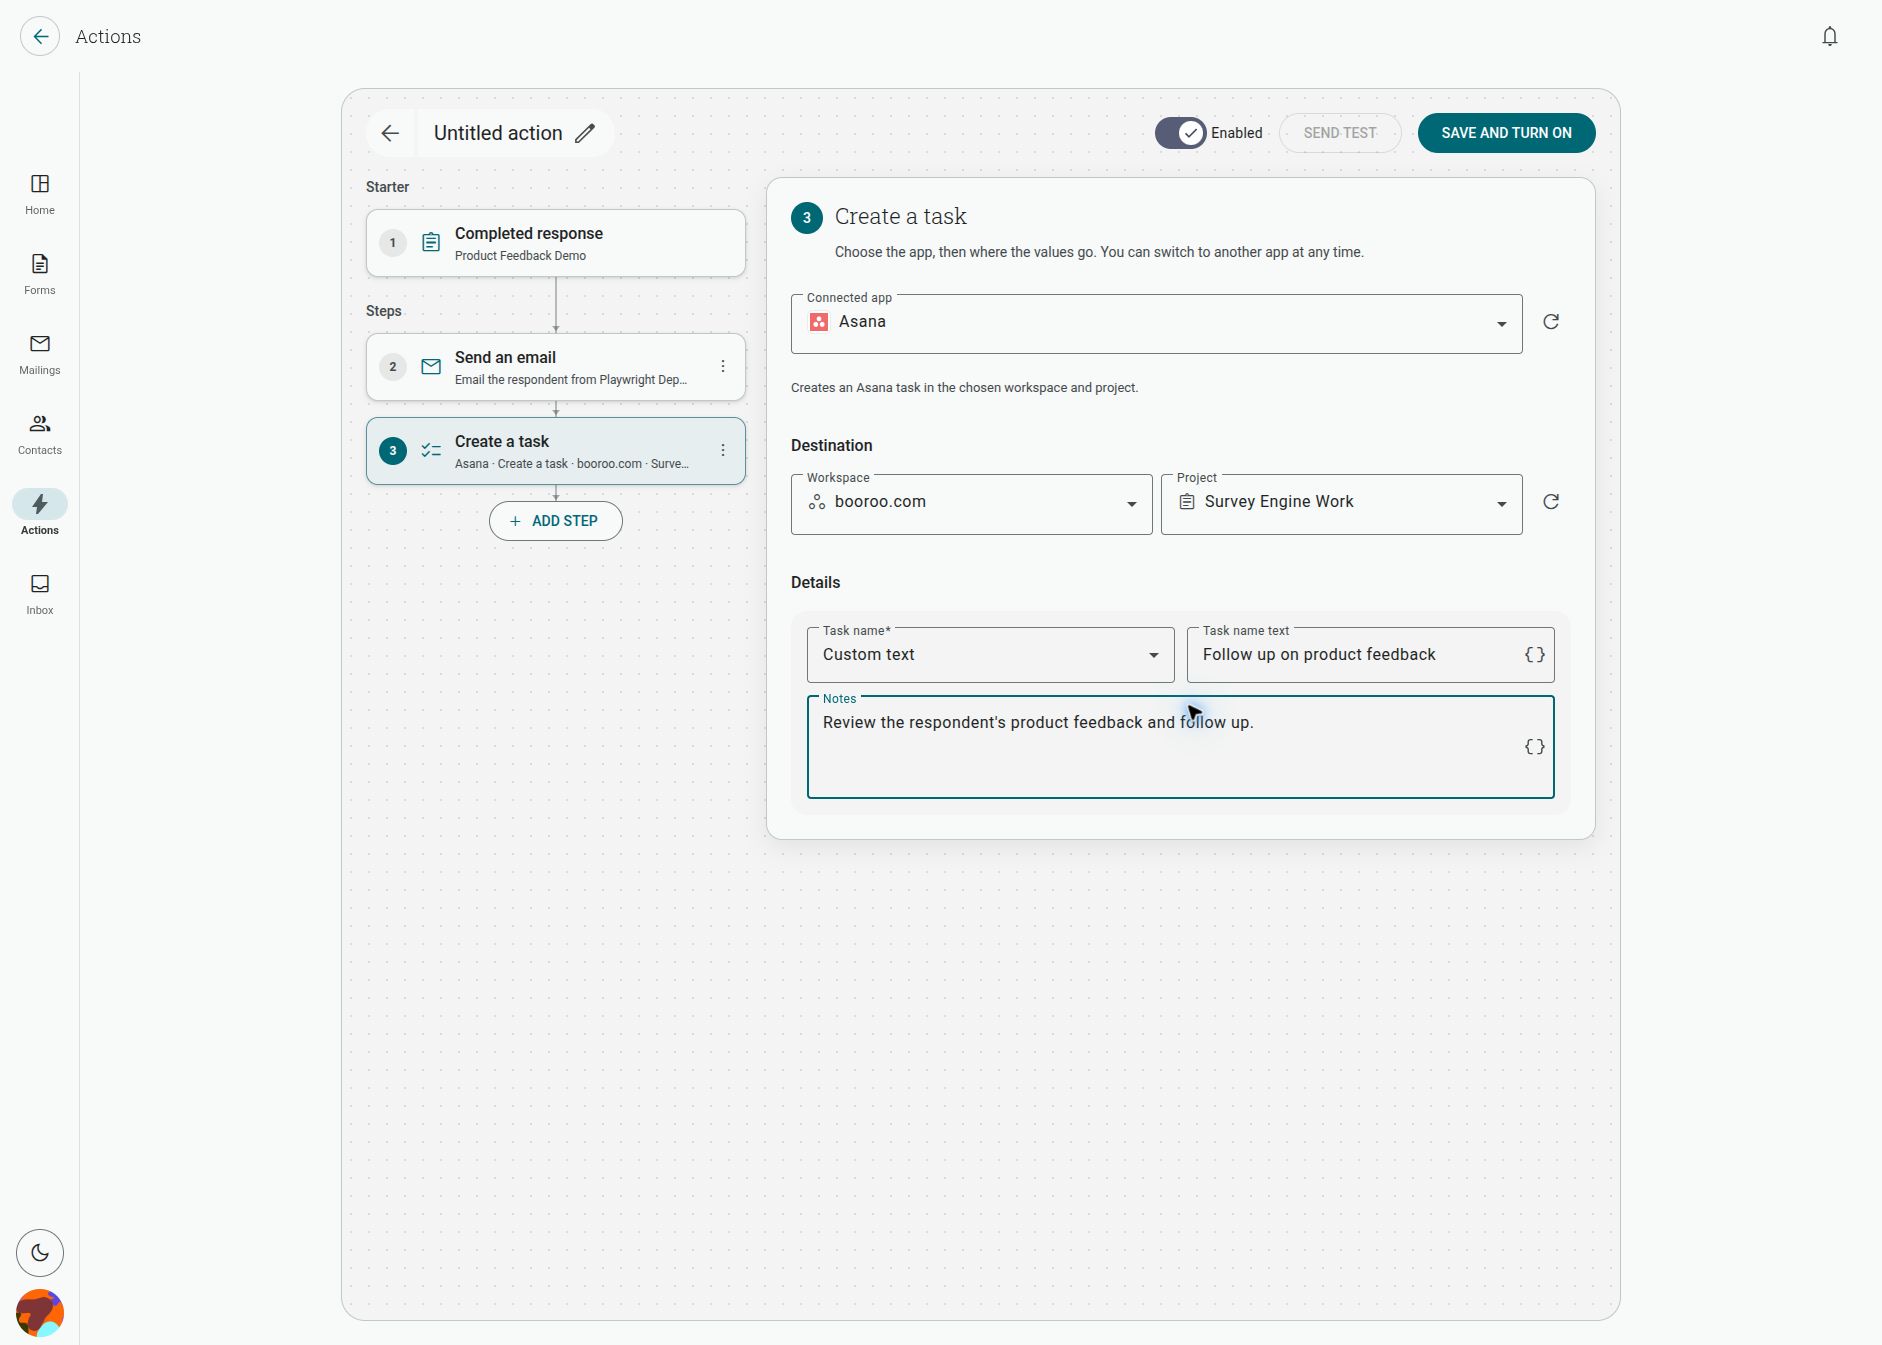
Section titled “How do I create an Asana task?”- Open the form’s Actions tab and create an Action with Completed response as its starter.
- Click Add step and choose Create a task.
- Select Asana, then choose the Workspace and Project.
- Set Task name with fixed text or a variable, and optionally add Notes.
- Save, test in a scratch project, and enable the Action.
Each run creates a new Asana task. The Workspace must be selected before the Project list can load. If a destination is missing, use Reload destinations and check the connected account’s access.
How do I create work in monday?
Section titled “How do I create work in monday?”Choose monday in the app picker, then select its Workspace, Board and Group. Set the item name and map values into the board columns offered by the connection. The available columns depend on that board, so the fields can differ between boards.
Which other apps can create tasks?
Section titled “Which other apps can create tasks?”The current app catalogue provides task steps for Asana, monday, Microsoft To-Do (Business), Notion, Planner and Trello. The destination and fields depend on the app:
- Microsoft To-Do (Business): choose a List, then set Title, optional Notes, Importance (Low, Normal or High) and Initial status.
- Notion: choose Create a note, enter the target Database ID, the exact visible Title property name, and the page title. Optional note content can be added. Copy the database ID from the database URL; each run creates a new page.
- Planner: choose the Group, Plan and Bucket. Task title, Start date and Due date are available; dates are sent as UTC.
- Trello: choose the Board and List, then set the card title and optional description.
How do I create a ticket?
Section titled “How do I create a ticket?”Ticket steps are available for GitHub, Jira and Zendesk:
- GitHub: enter the repository Owner and Repository name, then map a required Title and optional Description. Use the owner and repository shown in the target repository URL. An organisation may require an administrator to approve Shout’s OAuth access, and the connected account must be allowed to access the repository.
- Jira: choose the Site, Project and Issue type, then set the required Summary and optional Description.
- Zendesk: set the required Subject and Description. The description becomes the ticket’s first comment.
The fields listed above are the fields currently exposed by these steps. If you need a priority, assignee or due date, check whether that destination offers a corresponding field before designing the Action; do not assume that every app supports the same fields.
Can I create a note instead?
Section titled “Can I create a note instead?”Choose Create a note and select Notion. Enter the database ID and visible title property name exactly as they appear in Notion, then map the page title and optional note content. A Notion database ID is an identifier for the destination database, not a Shout form or workspace ID.
Can I include response or ticket details?
Section titled “Can I include response or ticket details?”Yes. Use Insert variable in fields that support it. The picker can provide response values, contact details, questions and ticket details. The destination app may impose its own field length or type limits; test a representative response before enabling the Action.